Most Common Breeds to Fluff Dry
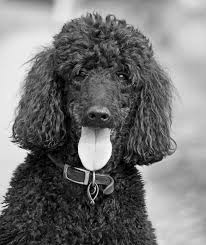
Almost any dog breed with long hair can be fluff dried but it is more common to fluff dry the breeds with wavy to curly hair.
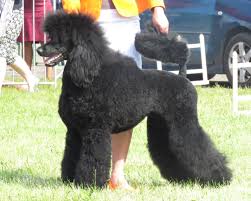
The purpose of fluff drying is to straighten the hair. This technique not only gives the dog a beautiful look it is needed to achieve a good even hair cut. Breeds like Poodles and Bichon are mostly scissor cut and must be fluff dried to get that velvety look. Furthermore, fluff drying is a great way to make sure you have removed all the tangles in your dog’s hair.


Tools you will Need to Fluff Dry
Before you attempt to fluff dry your dog make sure to have everything you will need ready.
To make this process as easy as possible you should always brush your dog before bathing. Do not bath a dog with tangled and matted hair, the results will be tighter tangles and mats that are more difficult to impossible to brush out. Also, trim off some hair before bathing. If your dog is way overdue for a haircut trimming hair before the bath will save you drying time. Don’t worry about getting an even cut now, you will be evening the hair after it has been fluffed dried.
Example: If you are giving your Poodle a Lamb cut you can go over the body with the #5 or #4 blade before bathing.
For Poodles, you should also shave the feet, face, tail, and belly before bathing. I see no need to waste time drying feet that will end up with no hair anyway.
After bathing towel dry to remove as much water as possible.
Place your dog on a grooming table and secure him/her with a noose.
If you own a Force Dryer use it to remove most of the water from your dog’s hair. The force dryer will also begin the fluffing process. Never twirl the force dryer, it will result in tangling the hair. Dry in an up and down motion close to the dog’s skin. You should be drying the hair from the skin out to the ends. When force drying the ears always plug your dog’s ears with your fingers or a cotton ball. The force of the wind can damage the ear drums, also never face the nozzle directly into your dogs face. Continue drying with the force dryer until most of the hair is dry and starting to stand up. This will vary with the length of your dog’s hair.
For those that do not own a force dryer, it will be easier to use extra towels to absorb more water after the bath.
Now it’s time to get the hair perfectly straight. This does take practice and you will get better at it each time you do it. Turn on your blow dryer that is either on a stand or holder. Set it to warm not hot with the air flow on high. You will be working in sections starting with the rear end of your dog. Let’s start with his/her tail, aim the blow dryer on the tail and begin brushing with your Slicker or Pin brush. You will be using soft but fast strokes against the grain of the hair keeping the brush flat. As the hair dries and straitens move on to the next section. Continue until the entire coat is straight and completely dry.
If the hair has already dried before you get to it you will need to re-wet it using water in a spray bottle. Don’t soak the hair just spray it enough to get the waves and curls out with the heat of the dryer while brushing.
Once you are done fluff drying go back over your dog’s hair with a metal comb to make it stand up and ready for the hair cut.
As you are learning this technique, you may notice sections on your dog that look better than others. Don’t worry about it, you can always go back over them or just let it be. Remember you are not taking your dog to a show so don’t expect perfection while learning.
I have searched and searched looking for a video to help you better understand how to fluff dry. To be honest I was quite disappointed in the way many of them were fluff drying and handling the dogs. I am a perfectionist when it comes to pet grooming but most important is that I am a gentle groomer and do not like to see other groomers handle an animal roughly. Below you will see the best video on fluff drying that I could find.
Now you know the groomers secret to fluff drying. The more you practice the better you will get and before you know it you will be fluff drying like a professional groomer. Please remember to always be gentle with your dog and always reward him/her with some love and a treat after every grooming procedure.
If you have any questions or need some help please leave me a comment below!
At Pawsitivity, we always use a fluff dryer for puppies, older dogs, and easily-stressed dogs. Though it takes longer to dry a dog’s coat and requires brushing at the same time to straighten the hair, it is not so stressful as the other drying methods.
We use hand-drying at the spa, which is unusual in the grooming industry because it takes longer than other methods and requires simultaneous brushing. However, we think it’s worth it!
Here at Pawsitivity, our first commitment is comfort for every pet client during their grooming appointment. This extends to the important, and often stressful, step that comes between bath and haircut: drying.
For a salon like ours that uses no kennel drying at all, there are two types of hands-on drying methods. The first is called a high velocity dryer (below). It has variable speed and is fairly quiet as dryers go. For double-coated dogs, a velocity dryer is necessary for proper grooming because it blows out loose dead hair from the undercoat, which no amount of brushing can completely remove.
The second type of dryer, called a warmer, is dangerous and can even be fatal. It is a heated box with a Plexiglass front, providing no open airflow (below). In this enclosed space, the air gets hot very quickly, which causes a hazard for overheating or even death, especially for dogs who are small, are brachycephalic, or have breathing problems.
What Is Fluff Drying & Why Do We Do It?
There are five basic drying techniques that professionals use on pets. They are based on size, coat condition, coat type, and personality of the pet. The coat type often will dictate which technique is used to produce the highest quality result. The different drying methods are:
Today I’m going to focus on the most important drying method to master – stretch drying techniques. The term ‘stretch drying’ is also referred to as ‘fluff drying’. The two terms can be used interchangeably. Becoming proficient at this drying method will increase the quality of your grooms while decreasing the amount of time it takes to groom each dog. Bottom line: that’s money in your pocket!
To get a quality finish on most clipper and scissor finishes, the coat needs to be as straight as possible. The goal with stretch drying is to remove the natural wave or curl from the coat. Typically, stretch drying is used in conjunction with high-velocity drying. It removes the last bits of stubborn curl while getting a coat dry. It is also a good drying option for those pets that do not tolerate a high velocity dryer well, especially around the head area.
Stretch drying uses mild, warm air with rapid, light brushing only where the air is striking the coat. It’s like the reverse of using a human curling iron, where you want to hold the hair around the iron for long time to get a tight curl. There should be between one and four brush strokes per second depending upon the length of the hair. The brushing technique together with the warm air sets the coat straight and gives the fluffy appearance. The better the stretch dry, the faster and easier it will be to finish the trim. A well-executed stretch dry is the only way to get a beautiful finish on a hand-scissored coat.
Dryers used in stretch drying will have a heating element that creates air temperatures from warm to very hot. Always be aware of the air temperature out of the dryer. Air that is too hot could be uncomfortable for the pet and, at worst, may burn its skin.
There are stand dryers designed for this process or a small, hand-held human hair dryer with side air vents can be used. The small, hand hair dryers normally are attached to the stylist’s waist or held in a bracket that hangs from the neck to place the dryer at chest level.
Brush selection is based on the coat texture of the pet and the length of the fur. On most pets, a heavy slicker brush used with light strokes is preferred. If the pet has extremely delicate skin and/or a short fine coat, a soft slicker will be the brush of choice.
Start on shortest coat on the body that needs attention, moving forward over the body of the dog towards the head. Next, work on fluffing the rear legs. Proceed to the front legs and finish with the head, ears, and tail. Work only in the area where the air is striking. Make your brush strokes swift and light, one to four strokes per second based on coat length. When dealing with a heavy coated pet, line brush the area where the air strikes. Remember, the goal is to straighten the coat. Don’t move to the next area until the coat is as straight as possible and the fur is bone dry. Straightening some coats will prove more challenging than others.
When working on the head, always cover the eye with a finger to prevent an accidental scratch from the brush. There are cases of pets receiving eye scratches from stylists who were careless with the slicker brush. This is obviously painful to the pet, and in the worst cases, can lead to blindness.
Where light matting is still left in the coat, the coat can be de-matted and stretch dried at the same time. If for some reason the mat cannot be removed, make a mental note to return to that area and remove it after finishing the drying, but before the finish clipping and scissoring.
On many coats, a pet hair spray will hold the coat straight, just as it does for people, and allows for more effective clipping and scissoring. Apply the spray as a final step in stretch drying. Lightly spray the section. Set the spray with the warm air as you quickly brush it in. Make sure all mats are removed before applying the hair spray.
It is important to master drying skills. There are several drying methods and combinations to choose from, based on coat type, trim, and pet tolerance. Incorrect techniques or careless attention to drying will waste more of a professional groomer’s time than almost anything else.
An active form of drying always will yield the best results. Having a beautifully clean and dried coat also will lessen the amount of time it takes to execute the final grooming procedures on a pet. It will help you earn you the highest scores in certification testing. It will help you win grooming competitions. But most importantly, pets that have beautifully prepared coats will create return clients for your business and save you time.